Wednesday, 30 April 2014

Resetting TRIAL Of Software And Use It Again - By Gaurav Raj


You all must have been thinking is there a way of using your software again when the Trail gets over, Yes you might have think of it, and here I come to solve your problem. I always come up with solutions, didn't I? ;)  

We do this kinda stuffs because we all are not eligible to buy the licence key of software. So, Have a try.

I will write two ways to reset, try the one which suits you best. The first method is to delete the registry files to remove the watermarks of software.

In this method you need to find and delete your trial software registry. After trial period is expired, uninstall the software and follow the steps. 
  • After uninstalling software, Open RUN (Windows key + R) and type regedit and hit Enter.
  • Now Registry Editor Window will appear and here navigate to HKEY_LOCAL_MACHINE \ SOFTWARE \ Your Software name from left pane of this window. If you find any Key name with your software name then just Delete that Key.
  • Similarly navigate to HKEY_CURRENT_USER \ Software \ Your Software name and if you find any key with your software name then just Delete it and close the Registry Editor window.
  • Again go to RUN and type %temp% and hit Enter.
  • Now Delete all the things in that folder. Don’t worry these are the temporary files and not necessary for your operating system.
  • Now go to C:\Users\your username here\AppData. Under AppData open all three folders "Local", "LocalLow" and "Roaming” and check. Under these three folders if you find any folder or anything with your Software's name, just delete it.
  • Now Restart your PC and install the expired software and you can use it again for trial period. If you install the expired software without following the above steps then you don’t get trial period back.

Another method is using a 3rd party software,there are many but I will provide here MY Favorite one.


RunAsDate - This soft will automatically reset your Trial of your software. Advantage of this program is that, you can run multiple applications simultaneously, each application works with different date and time, while the real date/time of your system continues to run normally. Now follow the steps to use RunAsDate.
  • Now click on browse to browse the desired application path.
  • Now Specify date and time and hit the Run button to execute the app on the specified date and time. 
  • After running the software using RunAsDate, don’t run it directly. If runs it directly without RunAsDate then trial period is ended instantly. To avoid any chances of running the software program directly, you can delete its shortcut from the desktop and create a new shortcut using RunAsDate and place it on the desktop.

That's It For Now, Have Fun. Share,Comment And Support.

Regards

 Gaurav

Tuesday, 29 April 2014

Spice Up Your Pc's Sound System - X-Fi Mod


Hello Guys! Today I'm gonna tell you how you can make sound module of your system a SONIC BOOM one! That means with awesome sound and clarity, No need of buying any extra Sound Card.Just follow my GUIDE and your good to go! But please not this is only working in some of the Realtek Chipsets,so give it a try once. So here is the guide you need.  


These features include Dolby Advanced Audio v2, SRS Premium, Sonic Focus, DTS, THX Pro Studio, etc. Additionally, fetures such as Crystalizer, EAX Effects, X-Fi CMSS 3D, SVM, etc can me made available via Creative's X-Fi MD 2 software
.Please note that these features will depend on which Realtek chip you have onboard 

Windows 7 and Windows 8 both supported 32bit and 64bit.These Realtek Chipsets are only supported so check your version and then follow the guide.

Supported Chips: ALC880, ALC882, ALC883, ALC885, ALC887, ALC888, ALC889, ALC892, ALC861VC, ALC861VD, ALC660, ALC662, ALC663, ALC665, ALC680, ALC260, ALC262, ALC267, ALC268, ALC270, ALC272, ALC273, ALC670, ALC275, ALC233, ALC284, ALC286, ALC292, ALC383, ALC668, ALC900

How to check onboard chip version:


To check which Realtek chip you have onboard, follow these steps:

1. Go to Control Panel and open 'Realtek HD Audio Manager'.
2. In Realtek HD Audio Manager, click the 'i' button at the bottom-right corner.
3. In the windows that opens, check the text written with 'Audio Codec' (eg. ALC892, 896), this is your onboard Realtek chip version. Only ALC chips are supported by this mod.

Stuff to download:


> Modded realtek drivers.
> Creative X-FI MBII software

Link-Download

download the latest versions as per your OS.


Steps to install modded drivers:

Note - To install in Windows 8, you have to disable driver signature enforcement.

1. Extract the downloaded driver file.
2. Run Setup.exe from the extracted location.
3. The installer will ask to uninstall current audio drivers, allow it to do so. Reboot when prompted.
4. After reboot, the modded driver installation will continue. Allow it to do so.
5. If you get any warning about lack of digital signature by driver or something related to identity not verified, then select "Install anyways" to allow the installer to install modded drivers.
6. Reboot when prompted.
7. You are done.


NOTE: T
he features unlocked will purely depend on the Sound Chip you have.

Steps to use Creative X-FI MB II software:

1. Extract the downloaded creative software file.
2. Run "Setup.exe" from the extracted location.
3. Complete the installation. DO NOT RUN THE SOFTWARE NOW. Ignore any warnings about audio chip not supported.
4. Boot into Safe Mode.
5. Extract "Activator.7z" and run the activation file. this will allow to run Creative X-FI software on onboard Realtek chip.
6. Reboot normally.
7. Enjoy.


Note: Please make sure you use only 48 KHz as the default sound format, there may be playback problems above 48 KHz.

SRS Effect can be found in Realtek control panel. Other effects like SonicFocus, Dolby, DTS etc can be found under specific playback device settings. Steps to reach there are below:

1. Right click on volume icon in taskbar.
2. Click on "Playback Devices".
3. Double-click on the playback device you use, eg. speaker , headphones or digital audio.
Here you fill find all the unlocked effects.


If You Have Any Queries Ask Me And Don't Forget To Share This Post.

Regards 

Gaurav

Monday, 28 April 2014

Windows 8 .NET Framework 2.0 and 3.5 Issue [Solved] [Offline Mode]


Having Problem Running Softwares Which Require .NET Framework 2.0 and 3.5 In Windows 8? Now Its Solved.

You must have faced this issue in Windows 8 while running some softwares. Now you don't have to worry,that can be solved by this simple process. Check this out!

Step 1:


Firstly,Insert Windows 8 DVD or mount ISO image. The source of this feature can be found in folder E:\sources\sxs. (Here, E: is the user’s drive letter on which the user has loaded Windows 8 Media, Your CD/DVD Drive)


Step 2:

Open CMD.EXE with Administrative Privileges. 

Run the following command Dism.exe /online /enable-feature /featurename:NetFX3 /All /Source:E:\sources\sxs /LimitAccess, and hit Enter. [Here E:\ refers to your removable media Cd/Dvd drive, replace E:\ with your drive letter of cd/dvd]


Step 3: Enjoy! Your done,it will take some time and you have successfully installed your .Net framework.

Any issues contact me.


Regards

Gaurav


Saturday, 26 April 2014

Increasing your INTERNET SPEED

We all know that slow internet sucks. so here is how you can boost your internet speed by up 20% straight on

How this works?
The operating system has 20% of internet bandwidth for reserve. If you disable it you can increase your internet speed

How to disable reserve bandwidth?
1. Go to start button

2. Go to run

3. Type gpedit.msc press Enter

4. Expand Administrative templates-->Network-->QoS packet scheduler

5. A new list should appear .Click on limit reservable bandwidth
     just Disable it

6.RESTART and you are done

some  more tips to increase your net speed to max

1. Use IDM(Internet download manager)

2. Use a good antivirus program

3. Remove unwanted add- ons and softwares


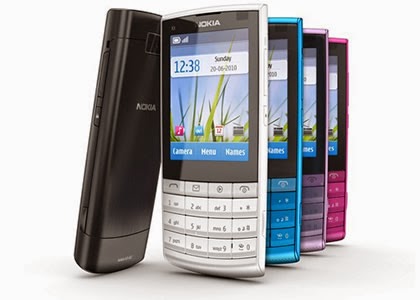
Multitasking In S40 Nokia Phones


I know now-a-days,use of JAVA based S40 phones are not very popular. All use Android,iOS,Symbian etc. The people who use S40 JAVA phones must have been feeling bad because they don't have a very needed feature i.e MULTITASKING. Right?

I am too a big fan of ANDROID but hey! I also used S40 JAVA phones in my past. So lets make it simple for you all, Just follow the instructions carefully and GOTYA'! Your phone can do multitasking now, This means it can run some applications at the same time without letting you to close previous app. Isn't it simple? Ya it is. Lets get to the point now.

First of all, You have to download JAF. It is a software used for operating BB5 and some other devices.

2-Connect your S40 Phone to your PC and keep in mind that it's in PC-Suite or Ovi suite mode. 3-Open the downloaded JAF folder,Run Pkey Emulator and open JAF from there.(Just run the Pkey Emulator) Now go to BB5 Tab. 4-Tick the following options. -Read pp. -Normal Mode. 
5-Now Click Service. 6-Save the *.pp file on Desktop or at any other place of your wish.7-Open the *.pp file in Notepad or any text editor.8-In case the Phone is- a-Nokia s40 v3 then Search for 28 1 line and change it to 28 2b-Nokia s40 v5 then Search for 48 and change it to 48 2c-In case there is no 48 or 28 then add the Appropriate line i.e 48 2 or 28 2. to the first row. (Not sure what your phone is S40 v3 or v5? Search it on Google or older Nokia (Now Microsoft) phones are s40 and newer ones are s60.9-Save the *.pp10-Open JAF>BB5 Tab.11-Tick the following:a-Upload ppb-Normal Modec CRT-308 (Already Ticked)12-Click on Service.13-Select the *.pp File.14-After it shows Done, Select Normal Mode from the Drop Down Menu.15-Phone will Restart and show "Test in RNDIS USB mode?" Press NO. This popup will be shown on every restart. This is normal, every time press no.

You have successfully cracked the Nokia's Security Walls. But Not Finished Yet. 

Now you have to edit the java application you want to run in your mobile and after that, the app will be eligible to multitask.

Steps-
1-Copy the Java(.jar) application to the computer.
2-Open the *.jar file with WinRAR.
3-Browse to Meta-Inf Folder and Open it.
4-Open the Manifest.MF file in Notepad.
5-At the end of the codes add this line  Nokia-MIDlet-no-exit: true
6-Save the notepad file.
7-Click on Yes when WinRAR asks to Update the Archive.
8-Copy the *.jar file to Nokia and you are done.


To Minimize the Application Open the application and press the Red button once. To Restore the Application Go to the folder where the application is and then press on the application once. Thats it, Your phone is also multitasking phone now.

Regards

Gaurav 


Friday, 25 April 2014

Assassins Creed 4 : Black Flag Lagging Issue


I was hearing about this lagging problem a long ago,but when I played this game myself,I too had this annoying issue.This issue exists mainly with the PCs with low end graphics card.
While experimenting to solve this issue, I came up with a solution which is very simple and doesn't require any other 3rd party softwares like Direct3D Enhancher or whatever,The solution just need your own fingers.
When you start your AC4 game just start playing it. When the game gets started up, just press these keys CTRL+ALT+DEL and you will be welcomed to the screen where task manager and other stuffs exist,we dont need anything from here. So the next step is to press ALT+TAB and select your AC4 game and enter it.
Dats it! Your done buddies.Problem solved. Wasn't that easy.
Regards
Gaurav

Sleeping Dogs Reviewed By Gaurav Raj

------------------------SLEEPING DOGS------------------------

Today I am gonna review this game by myself as I have already played this game and ya finished it too. This is one of the awesome open world game I have played after SR-4 and GTA-4. This game is wholesomely based on KickBoxing which is very popular in Thailand and all over the world. The game shows us the wars between Gangs of Hongkong. I will explain about this game as per my playing experience. So have a look.

Let me divide the game review into topics - gameplay, graphics, music and cutscens, details etc and finally rating.

Gameplay

Personally speaking, I found the gameplay pretty much interesting. It featured a lot to stick with u to the game,It has very good storyline and characters. It has big map,big buildings and cars as well. Developers have laboured very much to make this game the clone of Hongkong. You will find very good combat system when it comes to street fighting,it has a lot to offer you all.  But,there is very less use of weapons in this game because this game is mainly based upon street fight, Right? The use of environment is just mind blowing in the game's combat system. There are variety of objects that can be used to rip your enemy off :)

Open world gameplay has offered us very much and this game has offered us up to rank gameplay. Overall the gameplay is very good,all over the game, I will rate the gameplay 4.5/5.

Graphics, Music and Cutscens

When it comes to graphics, I would rather say its awesome,every detail can be seen in the game,and my favorite is the way characters are designed (specially there tattoos),and the surroundings are also designed extremely well. DX11 makes the graphics look awesome (more awesome if your PC rig is high). There is tearing of graphics, all the things are just smooth as butter.

For the game's music, I honestly feel that its not that good, You'll only hear the traditional Chinese music and Chinese soundtracks in the vehicles. Which is pretty much lame and will make you bore. (It made me bored though :( ). The soundtracks are not good overall,but ya the dialogues are very nice (You know what I mean).

Finally,the cutscens are very good,they are intelligently lined up,which will keep you entangled to the game.Detailing of everything like environment,characters,weapons,buildings,bikes etc are done very nicely

So,the verdict from my experience is, the game is a must play and everybody should give it a try once.Trust me it'll be worth spending your leisure time.

Rating Overall - 4.5/5

Cheers Mates! There is more to come.

Regards
Gaurav

Wednesday, 23 April 2014

SECRET CODES FOR ANDRIOD

THIS POST IS ONLY MEANT FOR THOSE WHO ARE USING ANDROID MOBILE PHONE, HERE I AM GOING TO GIVE YOU SOME USEFUL CODES OF ANDROID WHICH ARE THE MOST COMMON IN TODAY'S MARKET ,YOU CAN USE THESE CODES FOR KNOWING MORE ABOUT YOUR DEVICE AND CUSTOMIZE YOUR DEVICE, SO SHARE THIS POST TO ALL YOUR FRIENDS..


ANDROID SECRET CODES


For IMEI Number: *#06#  
For RAM Memory version: *#*#3264#*#*
For FTA SW version: *#*#1111#*#*
For FTA HW version: *#*#2222#*#*
For Touchscreen version: *#*#2663#*#*
View Phone Lock Status: *#7465625#
Executes Emergency Dial Screen to unlock PUK Code: **05**#
Enables Voice Dialing Logging Mode: *#*#8351#*#*
Disables Voice Dialing Logging Mode: *#*#8350#*#*
Change behavior of Power button: *#*#7594#*#*
To test Vibration and Back-light of device: *#*#0842#*#*
To test Proximity/Distance Sensor: *#*#0588#*#*
To test Touchscreen: *#*#2663#*#*
For Audio Test: *#*#0289#*#* or *#*#0673#*#*
To launch Service Mode: *#*#197328640#*#*
Hidden Service Menu (Motorola Droid): ##7764726
Field Test: *#*#7262626#*#*
To format the phone: *2767*3855#
To start GTalk Monitoring: *#*#8255#*#*
To get PDA, Phone, H/W and RF Call Date: *#*#4986*2650468#*#*
Displays Build Time and Change List number: *#*#44336#*#*
Packet Loopback Test: *#*#0283#*#*
LCD  Display Test: *#*#0*#*#*
Enter Service Menu (on New Phones): *#0*#
Diagnostic Configuration: *#9090#
USB Logging Control: *#872564#
System Dump Mode: *#9900#
To test Bluetooth: *#*#232331#*#*
To display Bluetooth Physic Address: #*#232337#*#
To test secret GPS: *#*#1472365#*#*
To test other GPS:  *#*#1575#*#*
To test WiFi/Wireless LAN of phone: *#*#232339#*#* or *#*#528#*#* or *#*#526#*#*
To display Wi-Fi MAC Address: *#*#232338#*#*
To Restore Factory Settings: *#*#7780#*#*
To create Immediate backup of your multimedia files: *#*#273282*255*663282*#*#*
To display Phone Information: *#*#4636#*#*
To get detailed Camera Information: *#*#34971539#*#*
For Software & Hardware Information: *#12580*369#
To display HSDPA/HSUPA Control Menu: *#301279#


HOW TO INSTALL WINDOWS 8 EASIEST STEPS


Here's a step by step procedure on how to install the new version of Microsoft's operating system on your PC.


Hardware Requirement

Windows 8 is compatible with all PCs running under Vista and 7. Here are the minimum hardware specifications required:
  • Processor: 1 GHz or higher
  • Memory: 1 GB or more for 32-bit versions, 2GB or more for the 64-bit version;
  • Disk space: 16 GB or more for 32-bit, 20 GB or more for 64-bit version;
  • Graphics Card: DirectX 9 compatible;
  • Additionally: a trackpad or multitouch screen/tablet to use touch interface.


Note that: PCs prior to 2005 may have a processor that does not support SSE2, PAE and NX bit functions, required by Windows 8


USING THE INSTALLER

You can use the installer version of Windows 8 Consumer Preview or download an ISO image from the Microsoft website.
  • Go to this page, "click on Get in Now", and then click Download Windows 8 Consumer Preview, and finally click on Run.
  • The application then determines whether your PC is able to run Windows 8 Consumer Preview and provide the appropriate download.
  • The installation program also offers a compatibility report and update support features.

Figure1: This computer is compatible with Windows 8 Consumer Preview.
  • If some items are not 100% compatible, you can also visit the online compatibility center.
  • A registration key is provided on the download page.
  • Note it down carefully or copy/paste it in the document (in Notepad for example).
  • You will be asked for it later. Click Next to start the download of Windows 8.
  • Two versions are available: 32-bit and 64-bit.
  • The downloaded version will be the same type as the operating system you are running.

Figure2: Compatibility issues 

USING THE ISO IMAGE

Visit this page and download the version you want to install. Once the ISO image is downloaded, burn it to a DVD. For your information, if the download was performed on a computer running Windows 7, simply double-click on the ISO file to start burning procedure. 

Installation


FROM THE INSTALLER

  • Once the installer is downloaded, a dialog box prompts you to begin the installation.
  • Select Install Now to put Windows 8 on the active partition or install it on another partition.
  • Then click Next and follow the instructions given by the wizard.

Figure 3: The wizard is ready to install Windows 8 Consumer Preview. 

FROM AN ISO IMAGE BURNED ON A DVD

  • Insert the DVD containing the ISO image in the drive and restart the computer.
  • Press a key when prompted to boot from the DVD.
  • Then simply follow the on-screen instructions to install Windows on the partition of your choice. 


Worlds First Transparent Tablet


WASHINGTON: Grippity has reportedly unveiled what is touted to be the first-ever transparent dual-side operable tablet. The tablet features a semi-transparent 7-inch 800 x 480 display and is expected to hit the shelves by next fall.
                              

                                                             View Video From Here


According to Discovery News, the tablet's both front and rear panels support capacitive multi-touch input and run on a Cortex A8 processor and Android 4.2.2 Jelly Bean with 4GB storage that can be extended to 32 GB. 

The Grippity tablet supports both Wi-Fi and Bluetooth, and also comes with IR blaster that allows it to function as a remote control. 

Grippity creator Jacob Eichbaum claimed that the tablet's partially translucent display makes it easier for users to type via a touchscreen keyboard and since both panels support touch, all 10 fingers can be used to type rather than just two. 

Recently, Samsung also patented a technology for a transparent touchscreen that would allow users to control the device from both the sides. 

The report said that the price of the Grippity tablet isn't clear yet but users can pay 235 dollars to reserve a slate for delivery by October 24 and early birds can pre-order the tablet for 159 dollars.

HOW TO DOWNLOAD YOUTUBE VIDEOS IN GOOGLE CHROME

Here is a trick to download youtube videos on Google Chrome


First Download the Extension from here :


And if the Google Chrome is Not Adding the Extension then
 Follow the Step
on  "How to Add Unauthorized extension on Google 
Chrome"

First Download the extension which are in .crx extention 
Open google chrome and go to
Control settings  > Tools > Extension 
Now locate your file in your System using File Explorer
and using the mouse Just Drag and Drop the Extension into the 
Google Chrome Extension page


After when it got Installed it will look like this


 This  Is Sure To Work If Any Issue Please Feel  Comment  To Comment Below 
 Our Team Will Sure Take care of it and try to satisfy u :::::::::

Welcome To XtremeTeck - A New Era Has Just Been Unleashed..

Welcome To Xtreme::Teck - A New ERA Of Technology Blogging.

This Blog has been created to assure all the visitors to get what they want.I will be posting things on Gaming,Technology,Mobiles,Gadgets,Android (My Favorite :) ),Reviews on different topics.

I will also be posting Tips,Tricks,Hacks on different topics,which will definitely help you all.All we need is your support to gain the trophy :)

Regards and love

Xtreme_Teck